In this post we are going to learn about Google tag manager (GTM) — What is Google tag manager, what are its benefits and how we can install it on our website. A step by step guide here!
Google Tag Manager is a free tool with the help of which you can manage and deploy all the marketing codes of a website without modifying it. Tag manager is also known as Google Tag Management system because all the marketing tags/codes are stored in one place.
Marketing tags or codes are Google Analytics, Facebook, Quora, Twitter, LinkedIn, Google Ads (AdWords) or other third party tracking tools.

How does it work?
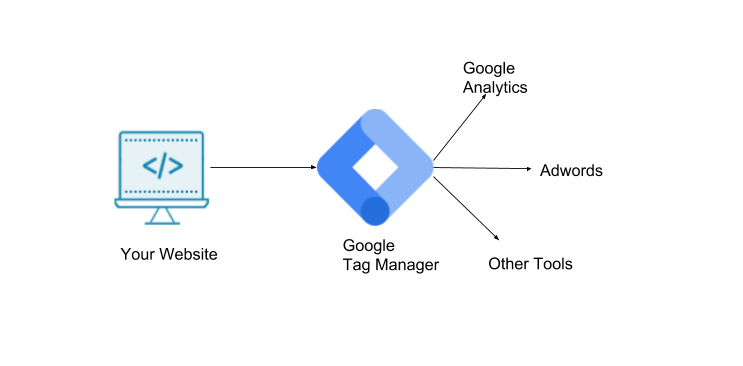
Tag manager acts as a mediator between your website, and marketing codes. Website sends data to Tag Manager, and Google Tag Manager sends data to marketing codes . It’s simple!
Why use it?
- It helps your website load faster.
- All third party codes are stored in one place.
- It works with non Google product like Facebook.
- No more dependency on developer will be required.
Structure of Google Tag Manager:
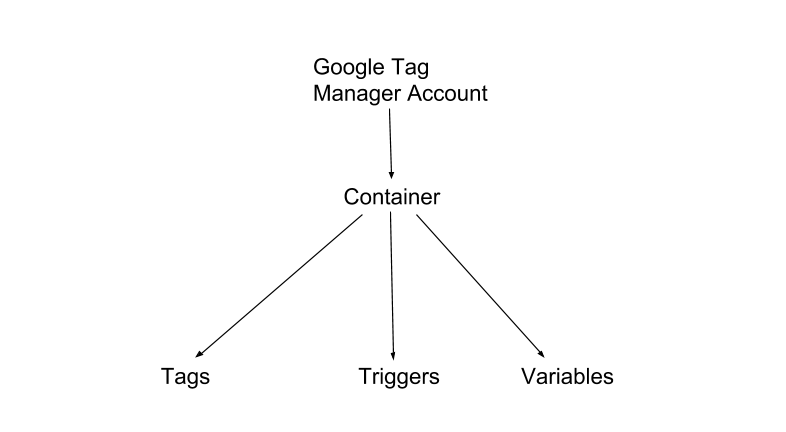
A website have a Container including tags, triggers, and variables.
Container is a combination of 3 elements:
- Tags – It’s a snippet code like java script or html code
- Triggers – It’s a condition or filter , It tells to GTM when or how to fire a tag .
- Variables – It receives and stores the information to be used by tags, and triggers.
How to install Google Tag Manager?
By following basic steps you can easily install Google Tag Manager.
Step-1 : Create account
Go to tagmanager.google.com and login through your Gmail account. Click on Create Account.
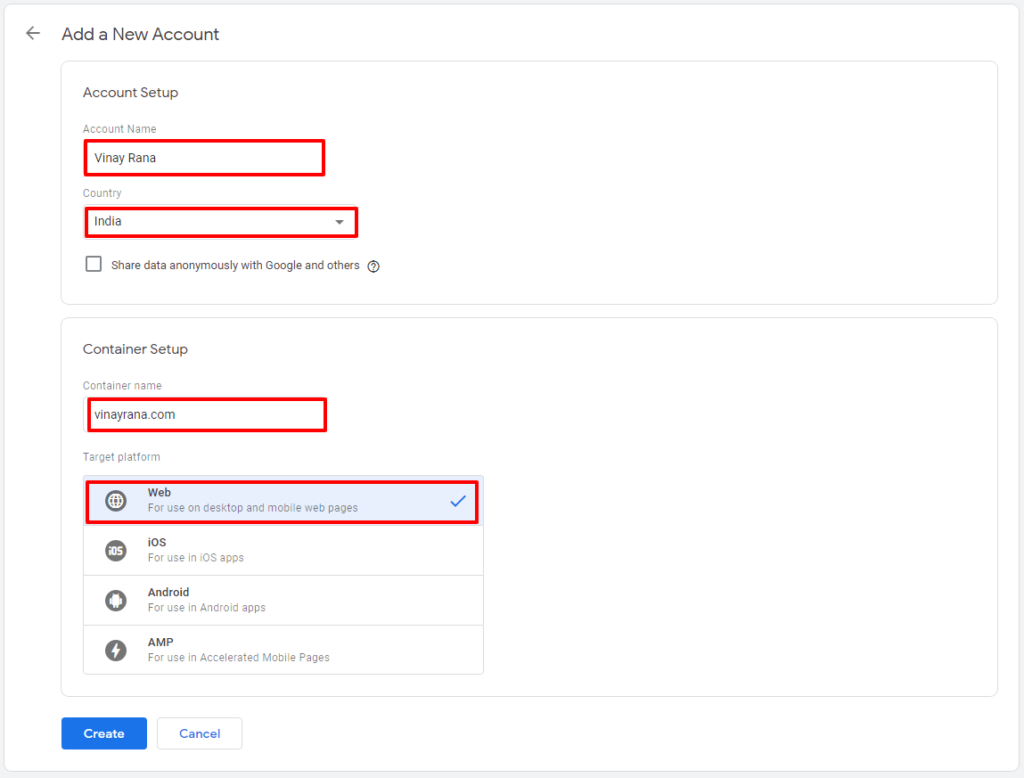
Fill in the page with required information.
- Give the name if the account like your name etc.
- Select country
- Put container value like websites URL
- Select web
- Click create button
Step-2 : Get tag manager code
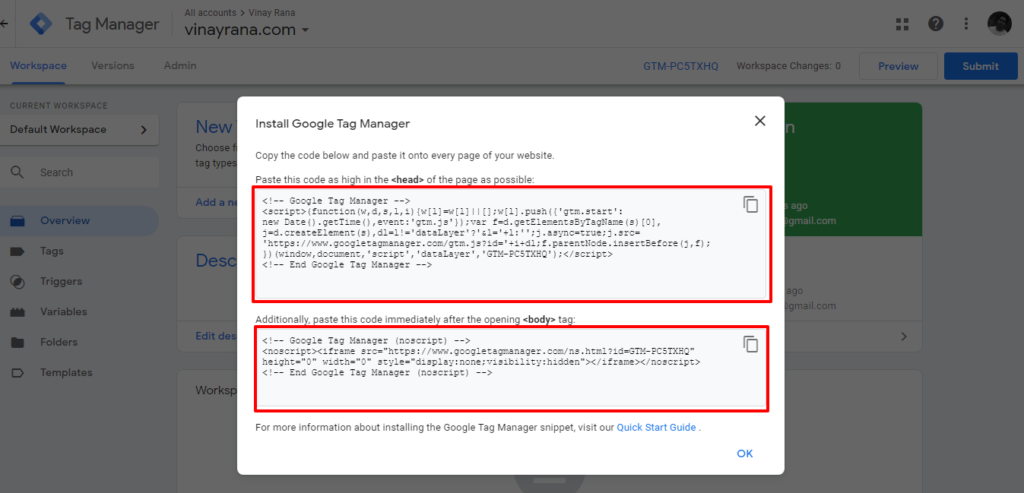
Google Tag Manager terms of service agreement page opens. Select Terms and conditions and then click Yes. After this you will receive 2 codes. One for the header and another for body.
Step-3 : Upload code on website
You can put the first codes at end of header tag(</head>), and second code at the starting of body tag<body> of website pages.
After upload both code, then refresh to your website. Press Ctrl + U, Code page opens. You can see the Header and the Body code where you applied them.
Follow the post for website in WordPress – How to Install Google Tag Manager in Your WordPress Website
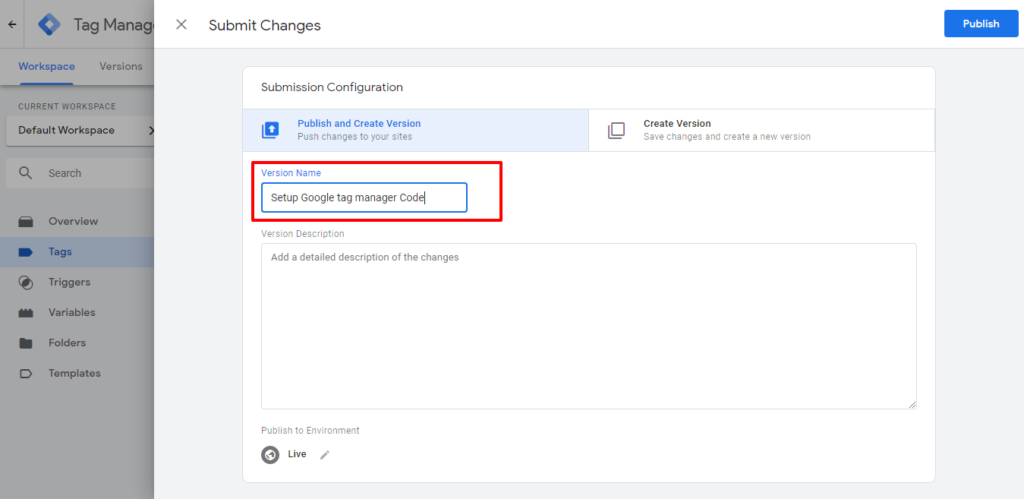
Step-4: Publish version in GTM
Go to Google Tag Manager workspace. Select ok. and Click submit button, then enter the version name, and click to publish button.
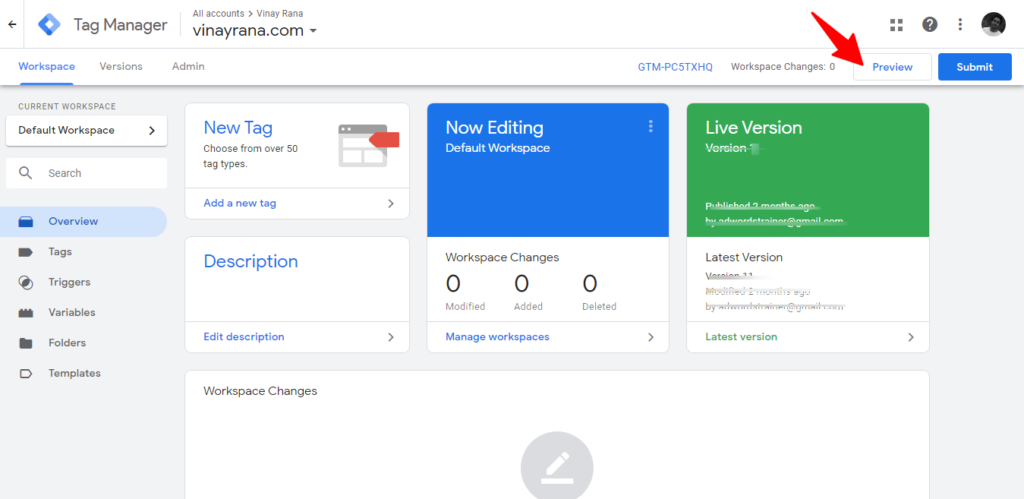
Step-5 : Check Code is working or Not
There are two ways to check whether google tag manger is properly working or not. one is preview mode and second is Google tag assistant.
Go to google tag manager dashboard and click the preview button
Enable preview mode for check GTM is working or not
Now open the website in same browser. you can see tag manager ID in below red mark.

Red mark is indicate that Google Tag Manager is working properly.
Now, click to leave preview mode.
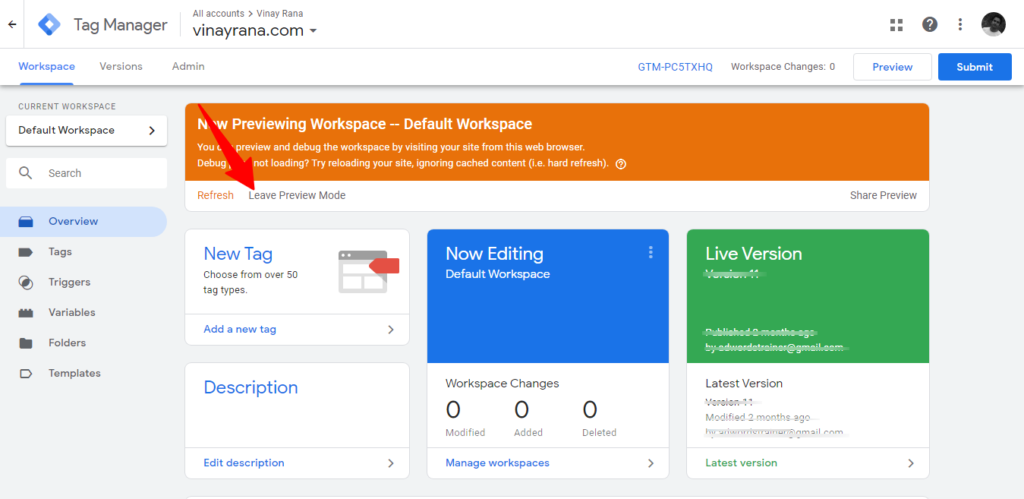
Leave preview mode
Finally, Google Tag Manager is installed on your website, and working properly.
Hope this post will be very helpful for you.
Very helpful blog shared by you sir about Google Tag Manager. Keep sharing this kind of informative blog to us. Thanks a lot sir because I learnt easily about GTM from your blog .